How to request SSL certificate from AWS Certificate Manager (ACM) and upload to Web Server
You can request public SSL/TLS certificates from AWS Certificate Manager (ACM) which is one of the service offer from Amazon Web Service. ACM takes care of the complexity surrounding the provisioning, deployment, and renewal of digital certificates! Certificates provided by ACM are verified by Amazon’s certificate authority (CA), Amazon Trust Services (ATS).
Even better, you can do all of this at no extra cost. SSL/TLS certificates provisioned through AWS Certificate Manager are free!
ACM let you to start using SSL in a matter of minutes. After your request a certificate, you can deploy it to your Elastic Load Balancers, Amazon CloudFront distributions, APIs on API Gateways, AWS Elastic Beanstalk, AWS Nitro Enclaves and AWS CloudFormation with a couple of clicks. After that, ACM can take care of the periodic renewals without any action on your part.
Prerequisite
- Has at least one domain name at AWS Route53 along with hosted zones
Services using from AWS on this blog
- AWS Route 53
- AWS Certificate Manager (ACM)
- AWS Elastic Beanstalk
Here how to Provisioning and Deploying certificate
- Go to ACM Console from AWS Service menu
- Click Request Certificate

- Make sure select Public Certificate Request and Click Request a certificate

- Enter Domain name want to request for certificate
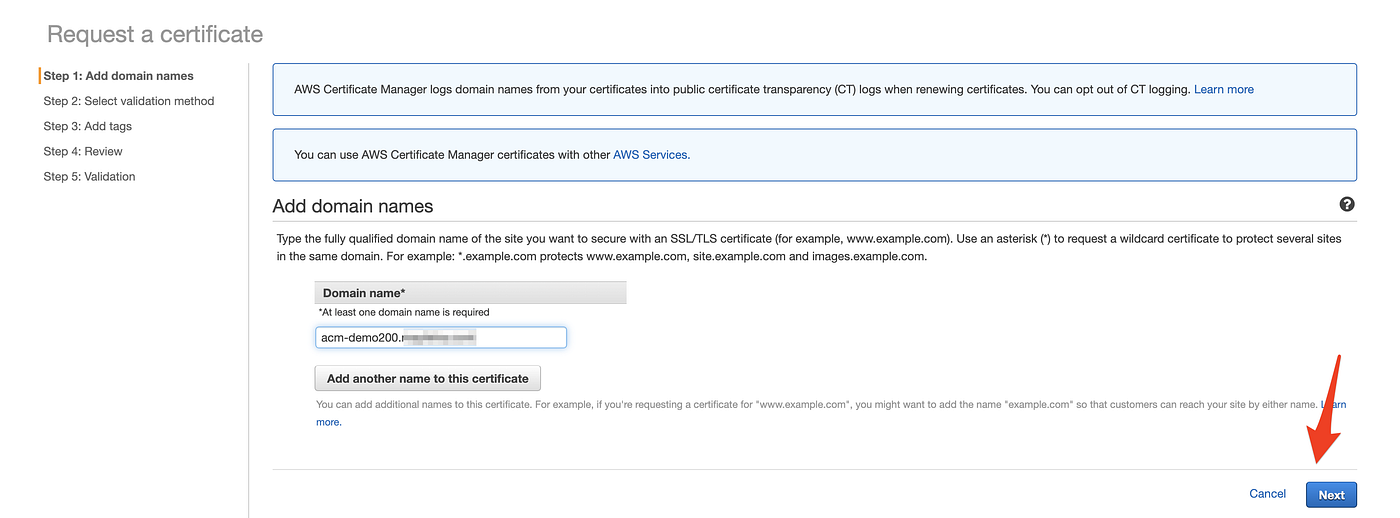
- Select Email validation (Personal preference) & click Next

- Enter the tag (Optional)

- Review the certificate for Domain and click confirm and request

- Click continue

- Example of out put

- Check email which register for this domain and click “Amazon Certificate Approvals” link
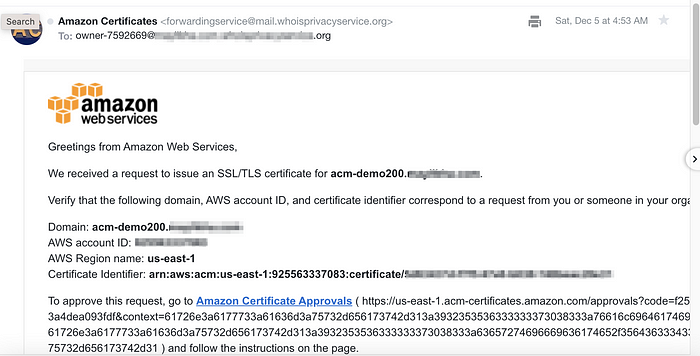
- After approved certificate pending status to issue

Create Web Application
- Create Web Application using AWS Elastic Beanstalk, which is very easy for creating environment with necessary requirement.
- Go to Elastic Beanstalk console from AWS Service menu and click create application
- Enter Application and choose Node.js as Platform.

- Choose Sample application and click Configure more options (Do Not click Create application)

- Select High Available radio button at top at Presets

- Click Edit on Load balancer (make sure select application load balancer)

- At Listener add port 443, upload SSL certificate provisioned earlier and select SSL policy (hint: lowest is highest security) then click Add

- (Optional) Disable http/80 from listeners

- Add listener rules for http, port 80, Priority 2 and Value (see below for detail) then click Add

- Add listener rules for https, port 443, Priority 1and Value (see below for detail) then click Add

- Example of listener Rules

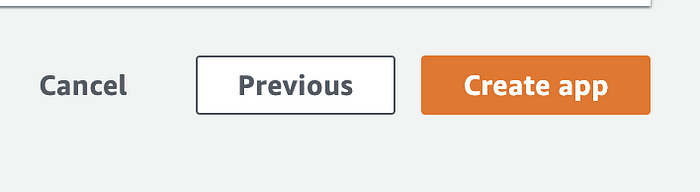
- Then Click Save and Create App
- Let’s wait for Elastic Beanstalk to finish creating Sample Web App. (around 10 minutes)

- Click Load balancer url from Elastic Beanstalk and see make sure app is running.
- Go to Load balancer console and see SSL policy and certificate areloaded or not

Create CNAME at AWS Route 53
- Go to AWS Route 53 console from AWS Service menu and select hosted zones
- Click DNS name which request SSL Certificate
- Click Create Record Set: enter fully qualified domain name which request for SSL Certificate at Name field and

- CNAME request can take around 2 hours for fully populate.
- After long wait… test CNAME with https , verify at Lock icon and see aws ssl certificate (see below for sample)

